Installing Arduino Library
Installing the library using Arduino Library Manager
-
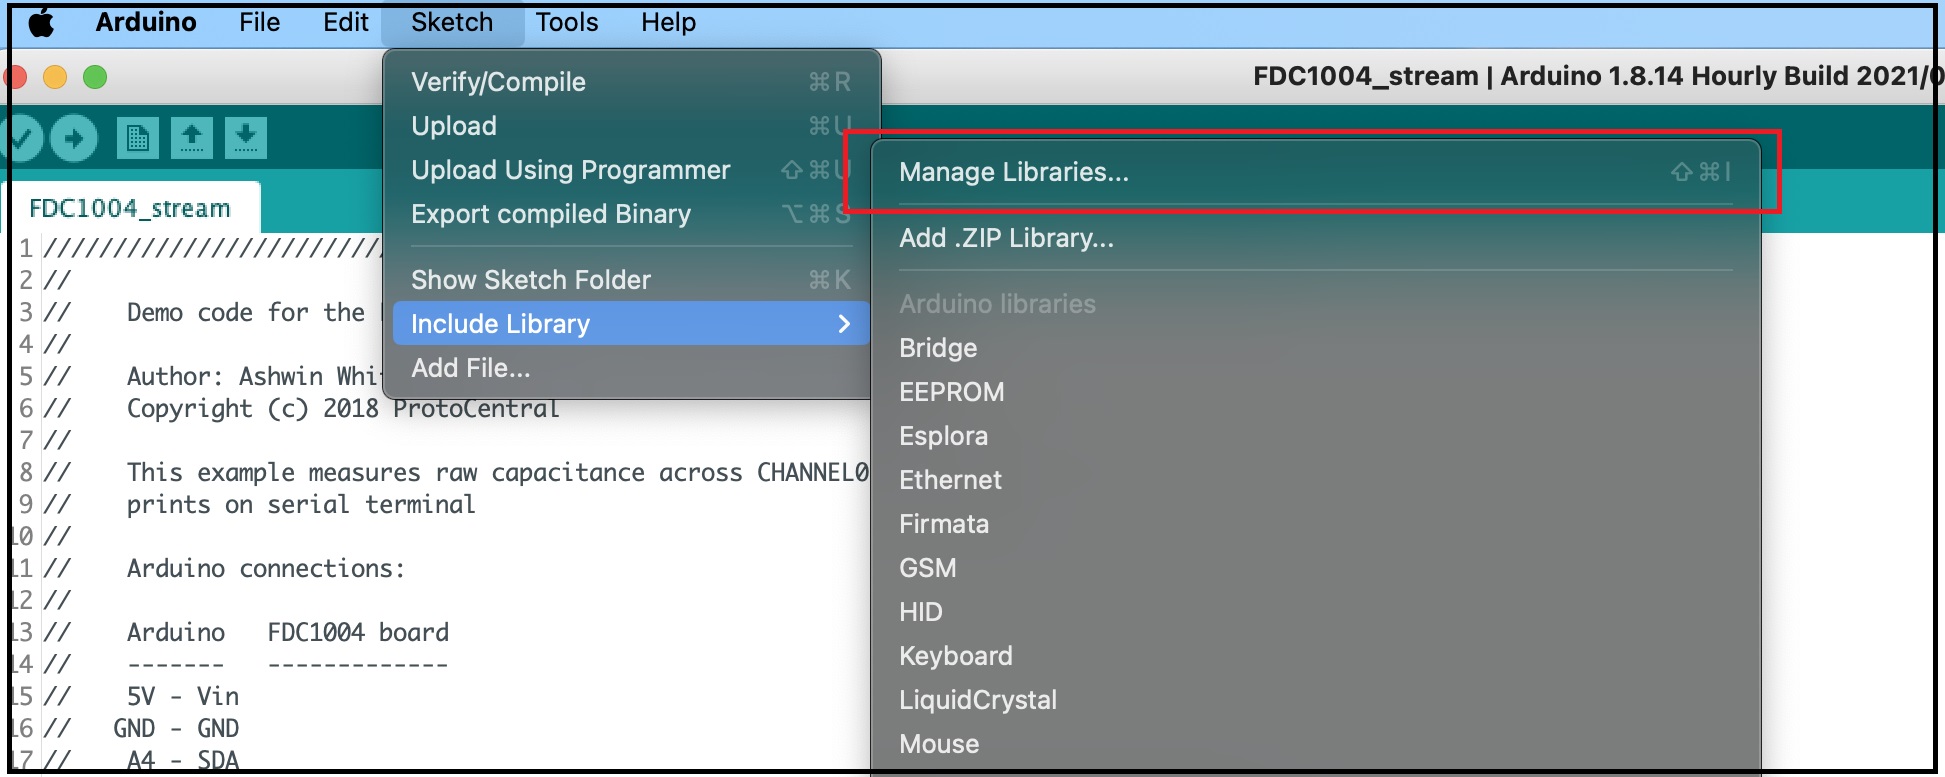
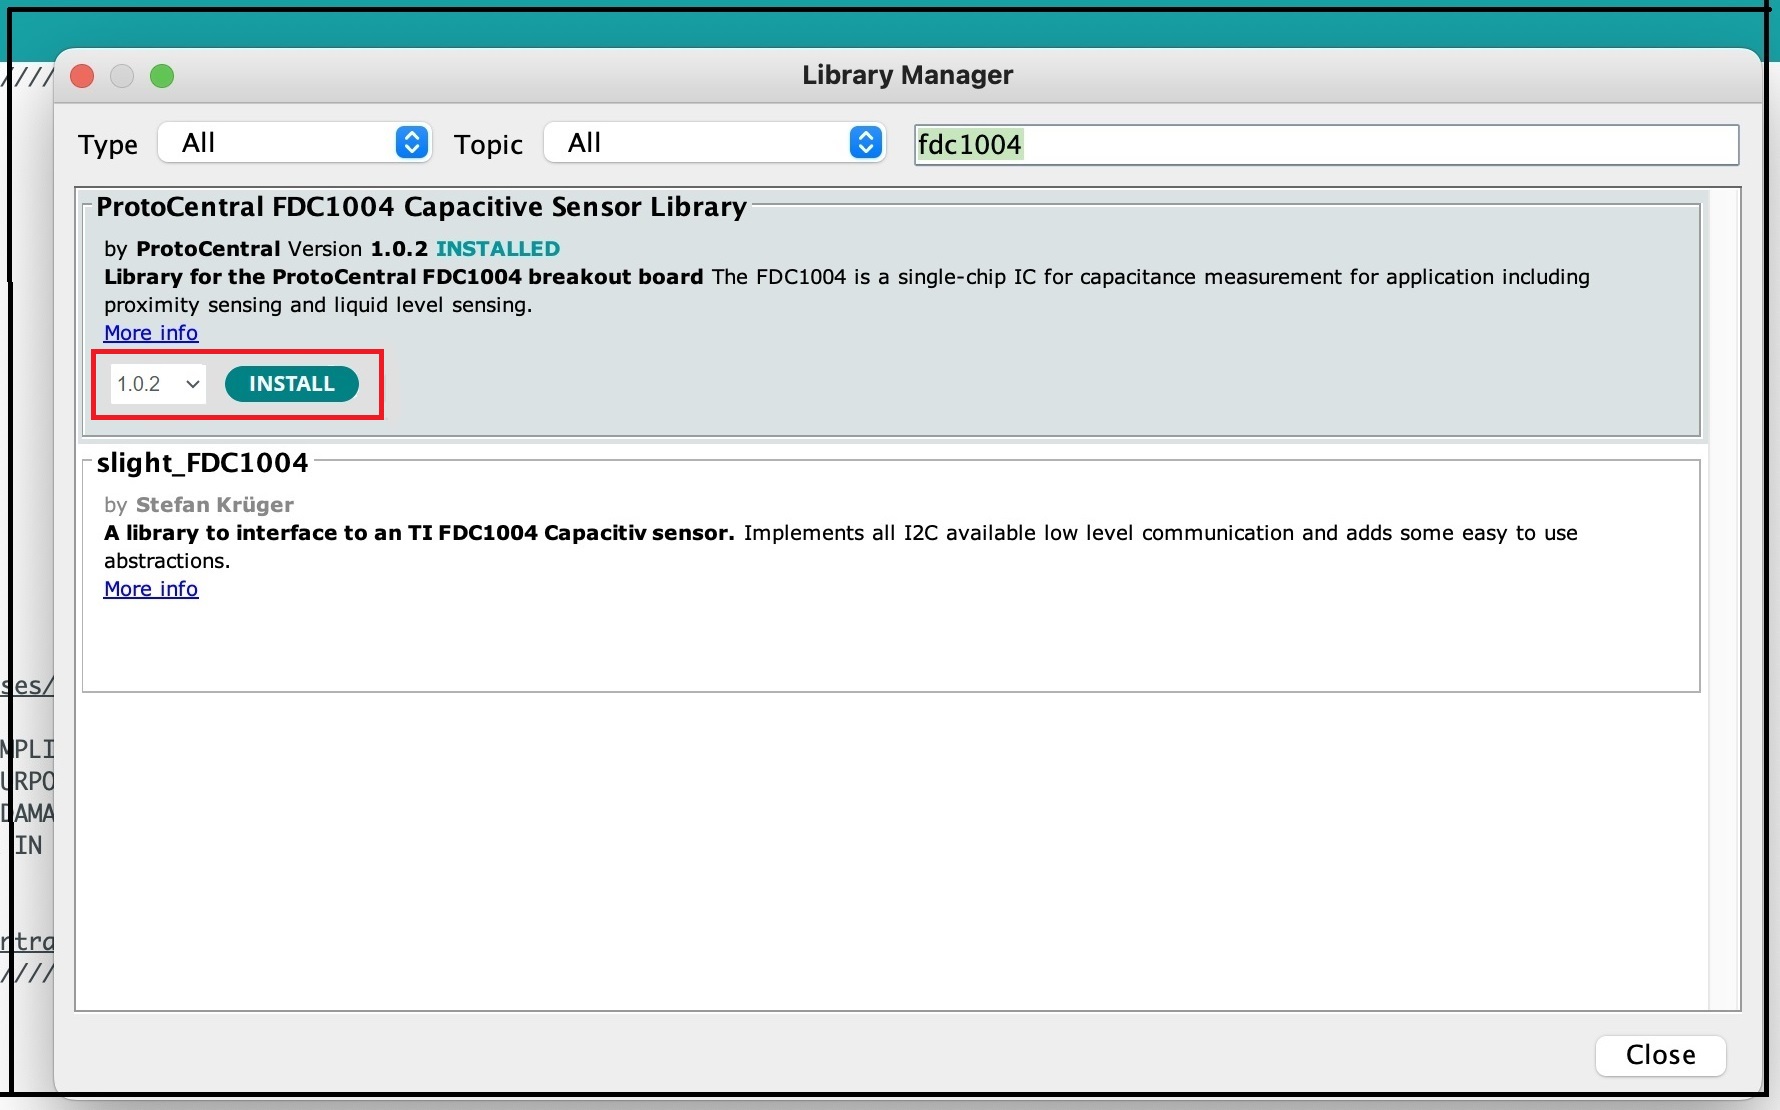
Open the Arduino IDE and click on Sketch -> Include Library -> Manage Libraries and to find a library for your product. Search for product name or keyword, select the desired library and the 'Install' button will appear. Click the button, and the library will install.
-
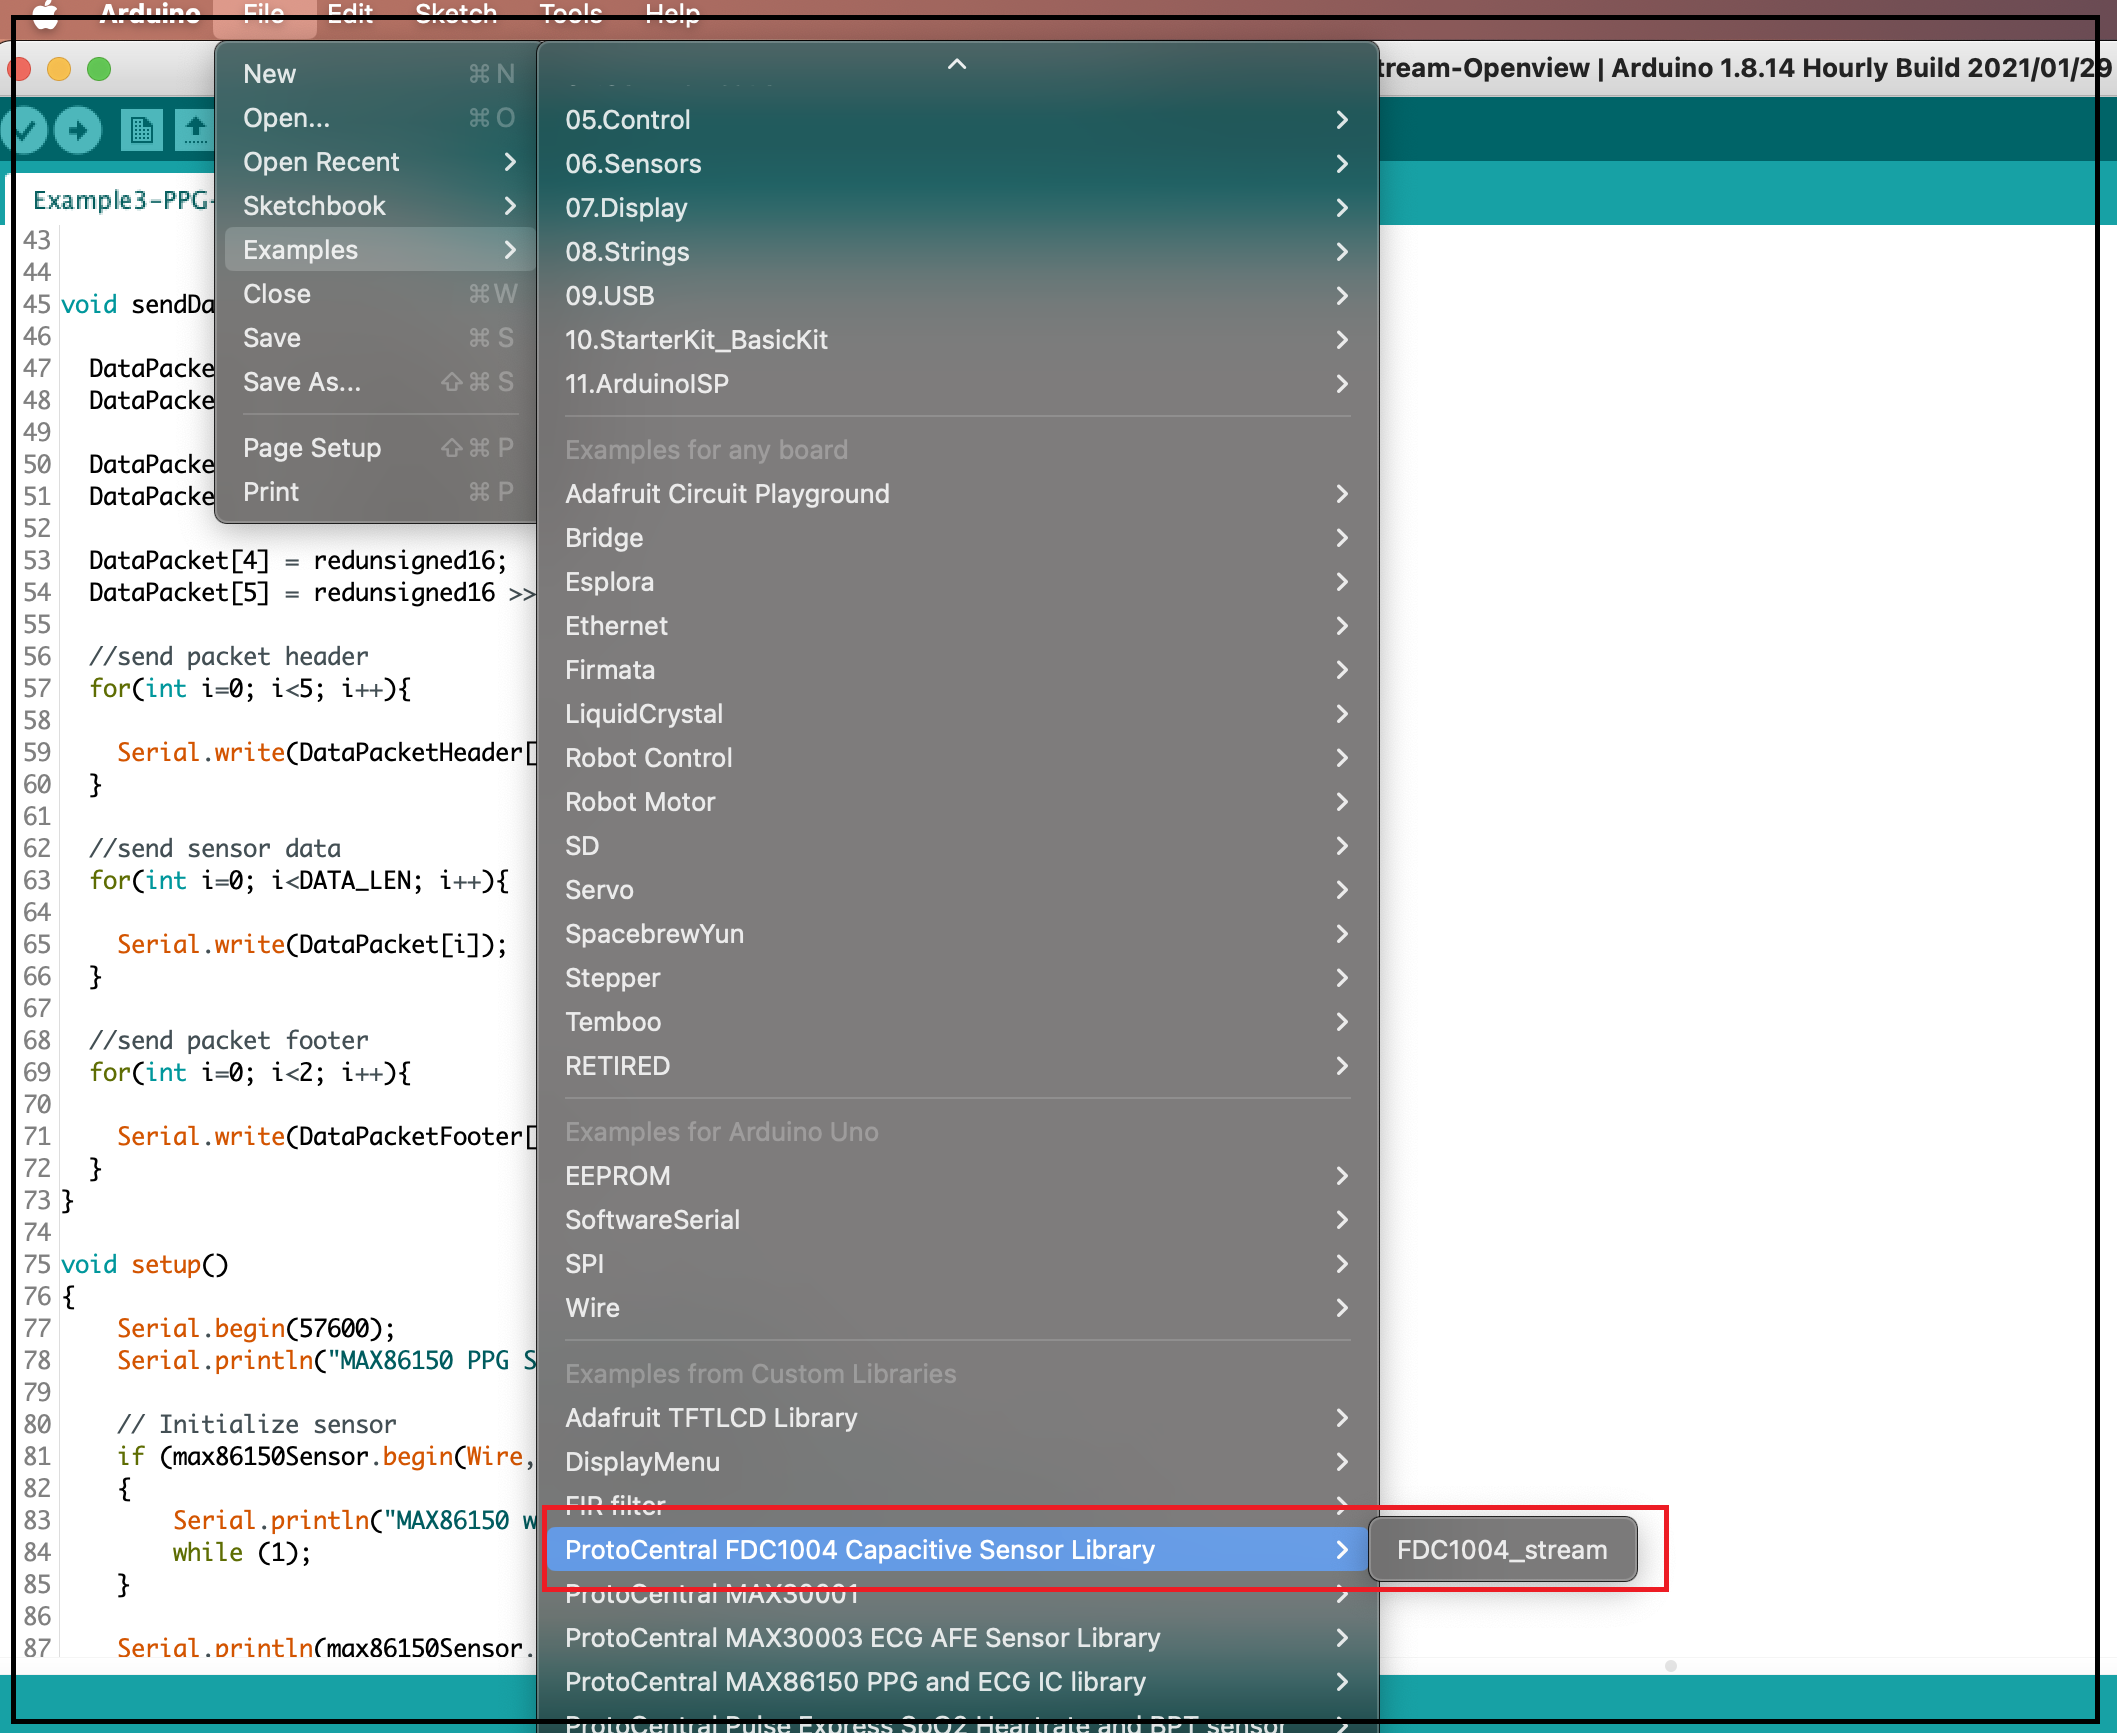
Once the library is installed succesfully, the examples of the respective product will be available to you. Click on File -> Examples and choose the .ino file
-
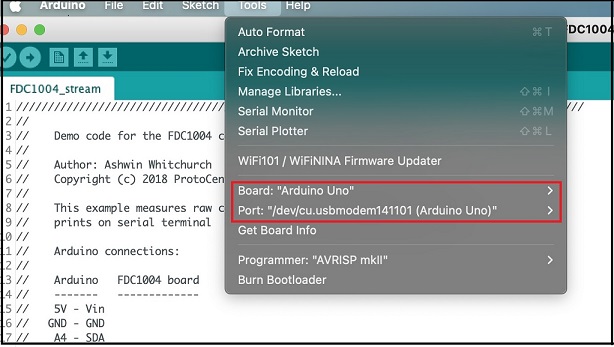
Go to Tools -> Boards and select Arduino Uno as the Board and navigate to Port to select the appropriate port.
Manually installing the library
-
Download the arduino library of the product as a zip file either from the GitHub repository of the product or using the download button given in the description page of the product.
-
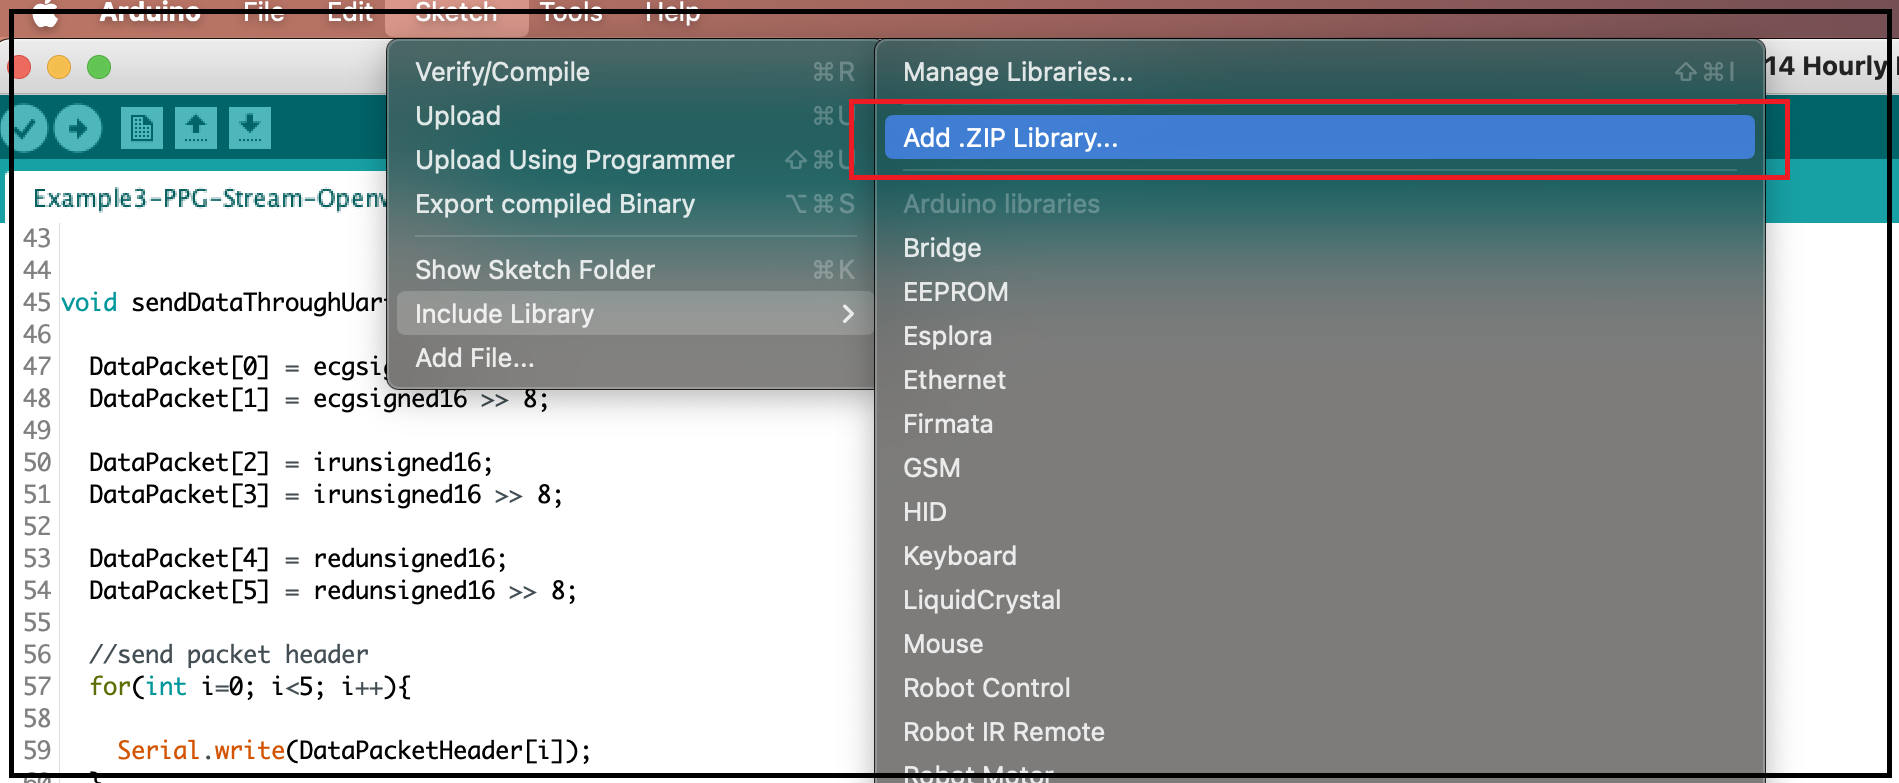
You can select the folder or .zip file containing the library of your product by clicking Sketch -> Include Library -> Add .ZIP Library, if you have a library of your own that you would want to add or if a library that hasn't been added to the Library Manager yet.
-
Arduino checks the library directory at startup so if you already have Arduino open, you will need to restart Arduino any time you add to the libraries directory. After restarting the Arduino, to verify the library has been installed correctly, click on File -> Examples and choose the .ino file
-
Go to Tools -> Boards and select Arduino Uno as the Board and navigate to Port to select the appropriate port.