Protocentral ADS1292R ECG/Respiration Breakout Kit
If you don't already have one, you can buy a board from here
Easily monitor ECG and respiration using your Arduino with this plug-in shield. The version 2 of this product adds a new SPI pin header making it compatible with newer Arduino devices including the Arduino Yun and 3.5mm connector for the electrodes. We now include the electrodes and cable also with the shield
Just plug it into an Arduino and you're ready to go. The 3.5 mm circular connector provides an easy way to connect electodes to the shield. The other end of this cable has snaps for standard ECG electrodes. We also include a pakc of 10 disposable EG electrodes. It accepts two ECG electrodes and one Driven Right Leg (DRL) electrode for common mode noise reduction.
Another interesting feature of this shield is that you can also measure the respiratory activity using the same two electrodes connected to the shield. The ADS1292R uses a method known as impedance pneumography to measure respiration using the changes in chest impedance caused during respiration.
Features
- ADS1292R Analog Front End IC
- Onboard 3.3V voltage regulator for low noise
- Onboard logic level transalators for Arduino interface
- Prototyping area for adding addtional components
Hardware Setup
Connection with the Arduino board is as follows:
| ADS1292R pin label | Arduino Connection | Pin Function |
|---|---|---|
| MISO | D12 | Slave out |
| MOSI | D11 | Slave in |
| SCK | D13 | Serial clock |
| CS | D7 | chip select |
| DRDY | D6 | Data Ready Output |
| START | D5 | Start Input |
| PWDN/RESET | D4 | Reset |
| VDD | +5V | Power Supply |
| GND | GND | GND |
Software Setup
Protocentral has already written the Arduino library for ADS1292R. You can obtain it by clicking the below button or by downloading it from ADS1292R Github repository.
Follow the instructions described in the Installing Arduino Library section, search for ProtoCentral ADS1292R ECG and Respiration boards Library in the Library Manager and install the latest version.
Arduino Example
Streaming on Openview
-
Based on the microcontroller being used, download either the Openview GUI or Openview 2.
-
Connect the electrodes provided along with the ADS1292R board to the body and to the breakout board as described in this section.
-
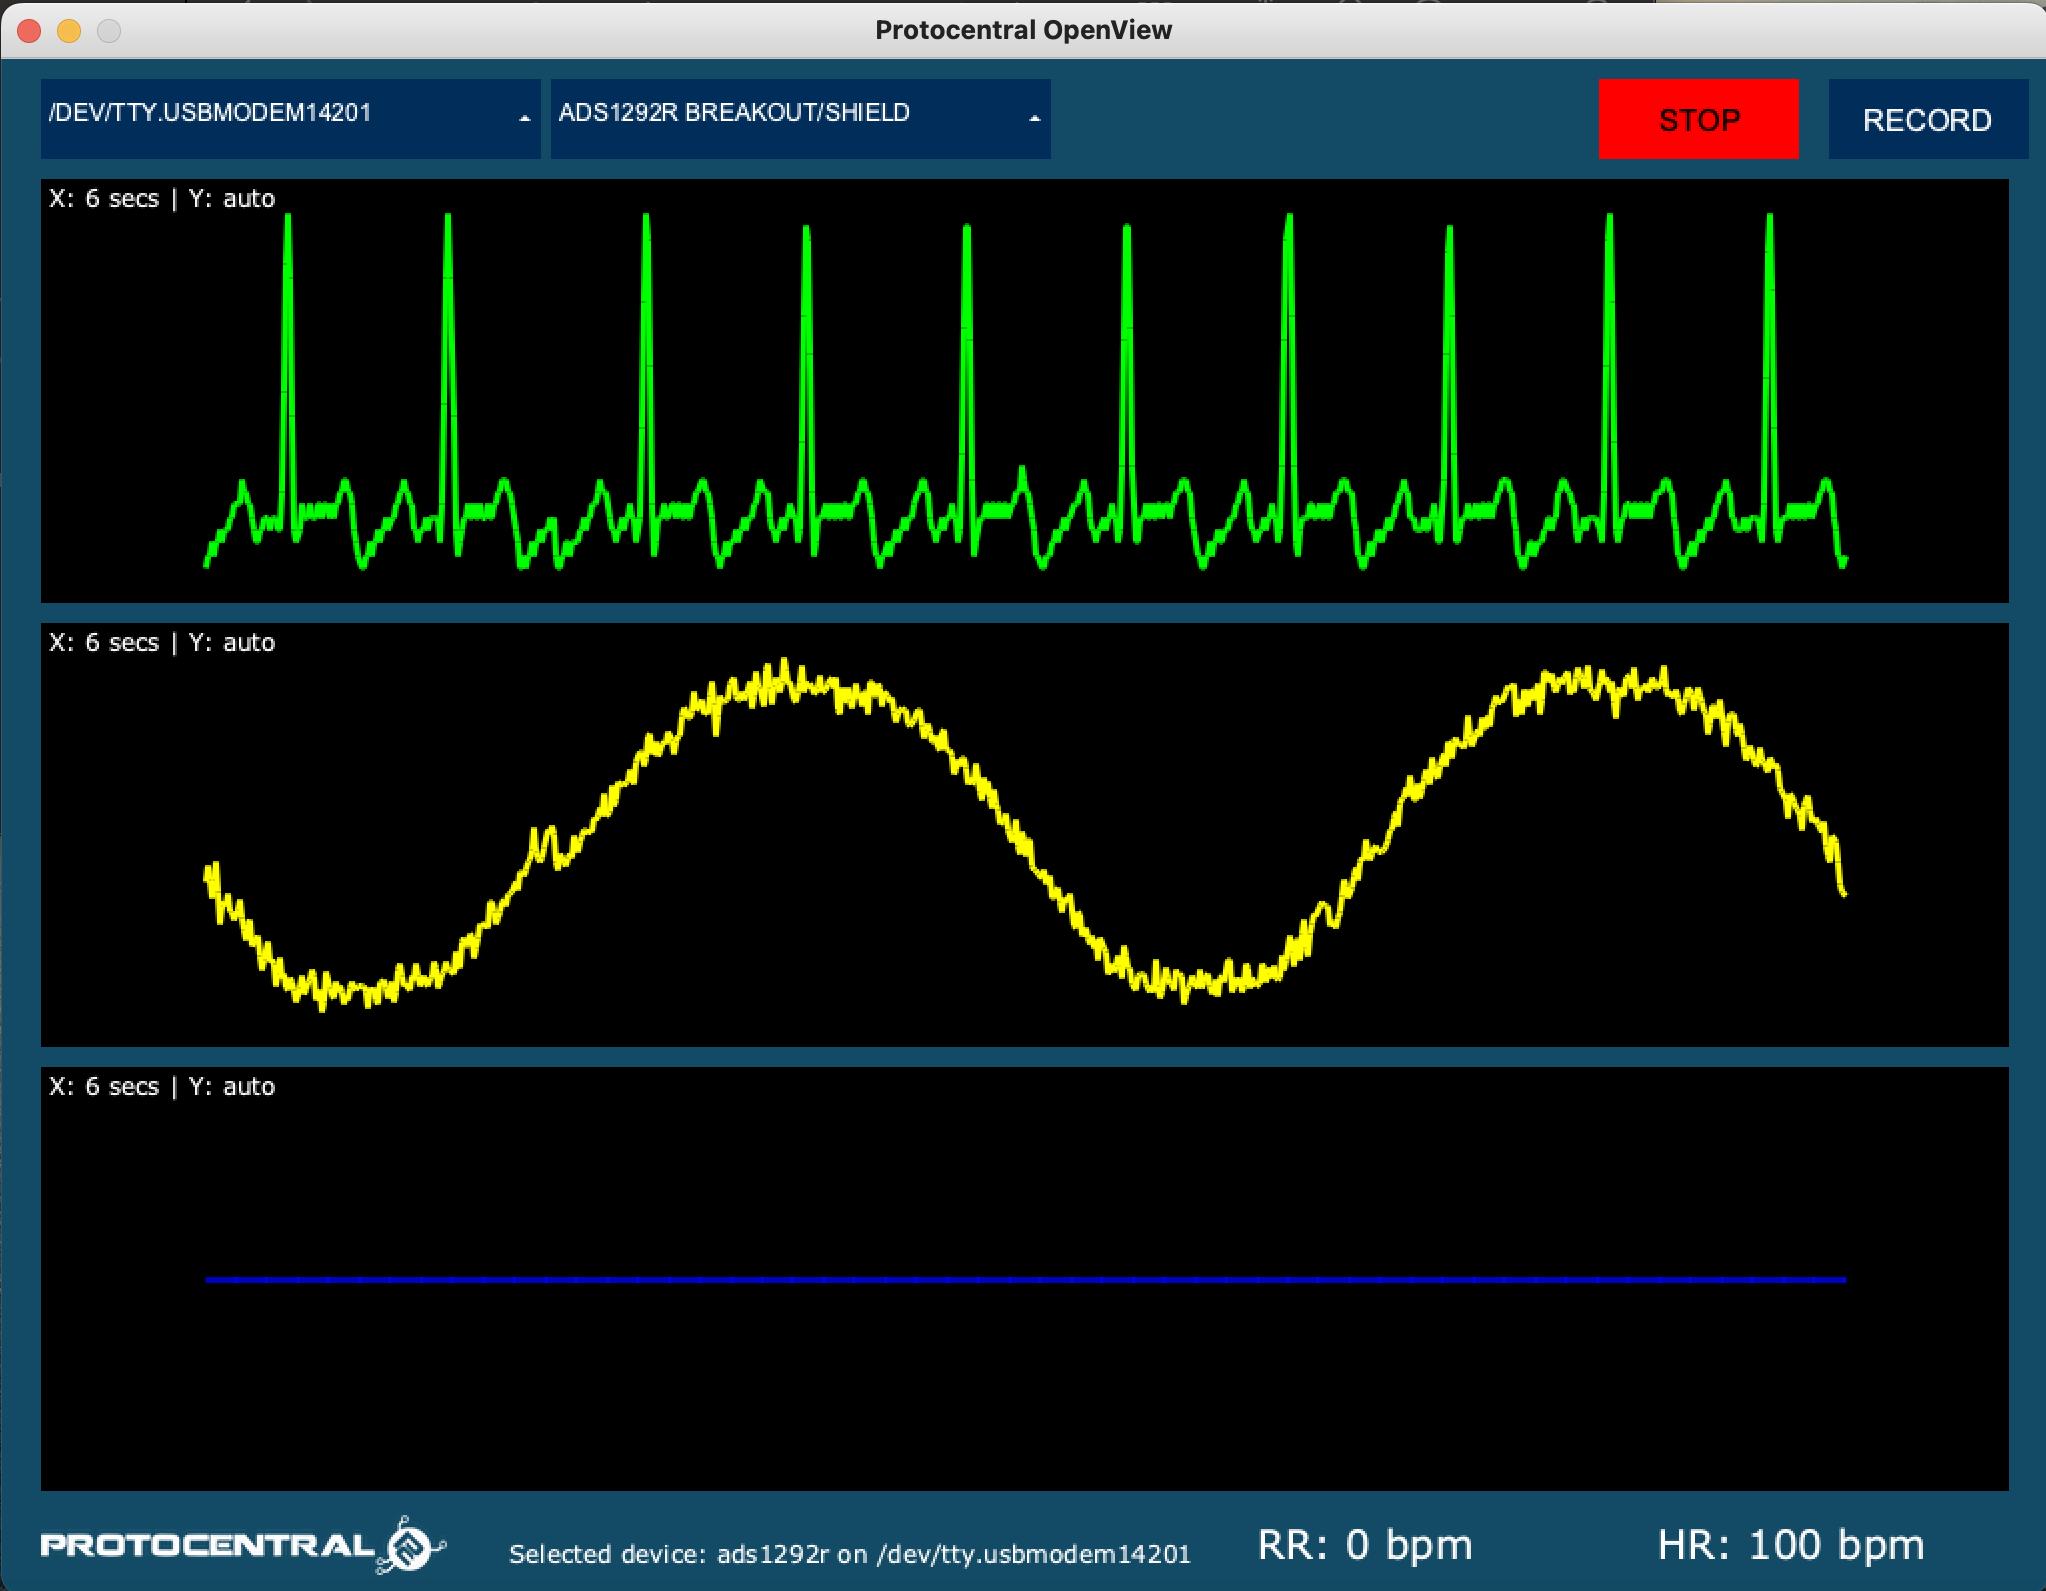
Open the GUI, make sure to select ADS1292R breakout under the Board dropdown and the appropriate Port. If everything goes well, you will be able to see the screen as pictured above.